
I’m working on a research project for my bachelor’s degree with two teammates: Akesh and Tharusha. We needed to train large language models (LLMs), which requires powerful computers and our personal computers just weren't enough for this task. Thankfully, Dr. Surangika and Dr. Nisansa: our project su helped us get access to Google Cloud Platform, where we can use more powerful machines. We tried setting up a computer with a GPU on Google Cloud by following various online guides, but none of them worked out at first.
After many hours of trying different methods, I finally set it up successfully. I wanted to share how I did it in this blog, hoping it can save time for anyone else who’s stuck like we were.
Installing NVIDIA drivers
1sudo apt-get install build-essential linux-headers-$(uname -r)select Y
1gcc --version
Run following command to download the package
1wget https://us.download.nvidia.com/XFree86/Linux-x86_64/535.104.05/NVIDIA-Linux-x86_64-535.104.05.run
Make the downloaded package executable using following command
1chmod +x NVIDIA-Linux-x86_64-535.104.05.runRun the following command to install the package. You need to follow on screen instructions and you may get few warnings mid-way, but you can just ignore them.
1sudo ./NVIDIA-Linux-x86_64-535.104.05.run
You can verify your nividia driver installation by executing following command. You may see a table of GPUs if your installation is successfull.
1nvidia-smi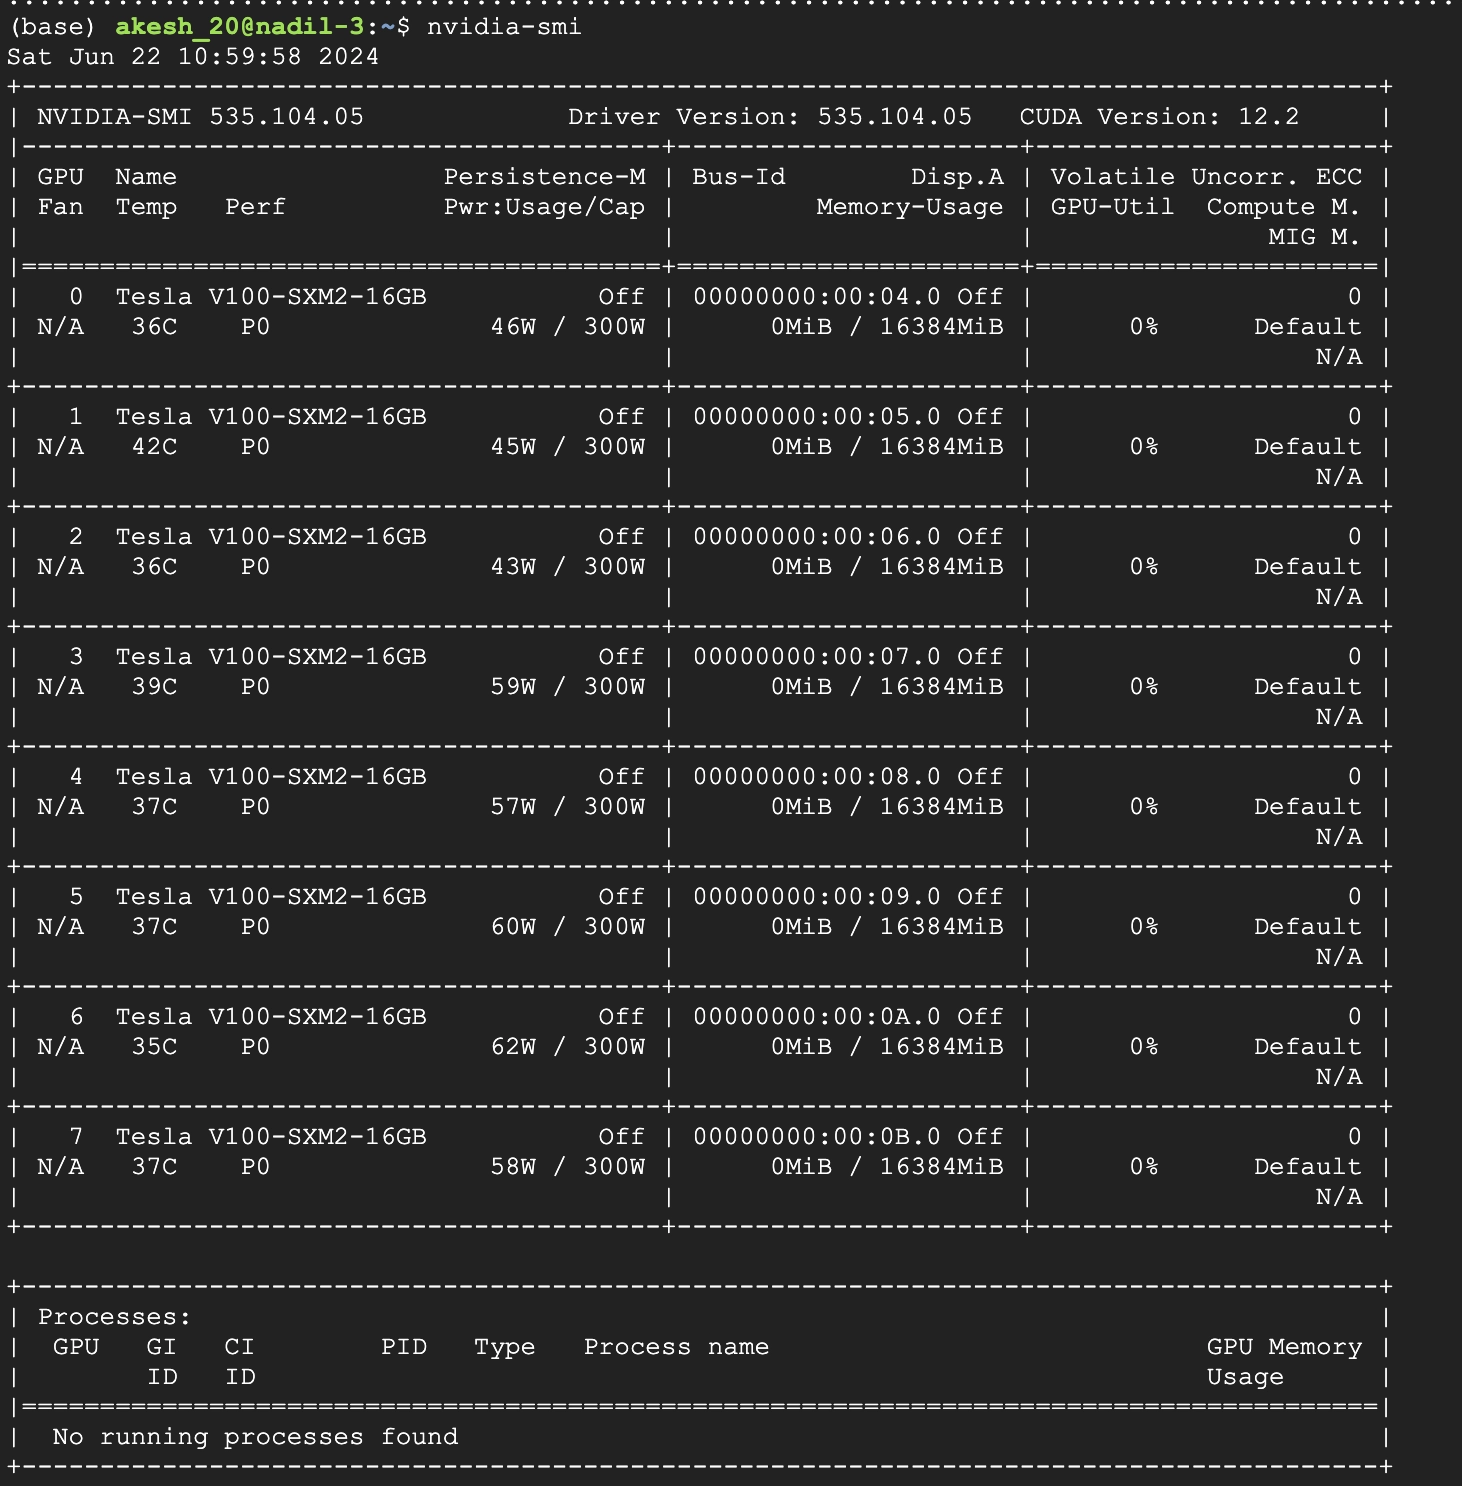
Installing CUDA
First make sure you have CUDA capable graphic driver
1lspci | grep -i nvidia
Make sure you have a supported version of linux
1uname -m && cat /etc/*release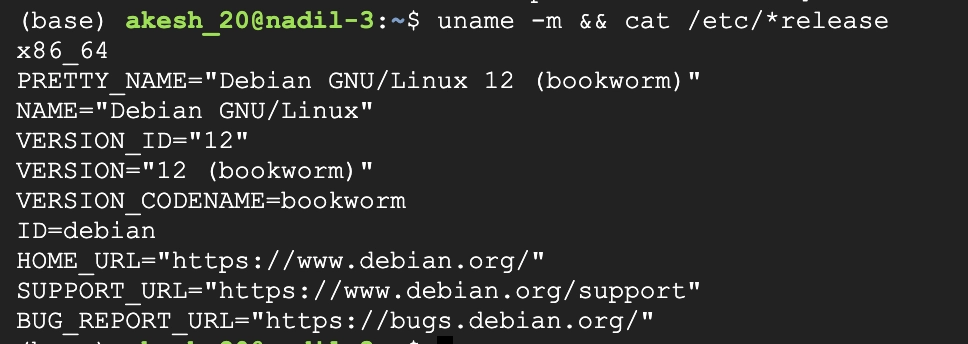
Verify the system has gcc installed
1gcc --version
Run following commands
1wget https://developer.download.nvidia.com/compute/cuda/repos/debian12/x86_64/cuda-keyring_1.1-1_all.deb2sudo dpkg -i cuda-keyring_1.1-1_all.debI’m not sure what exactly happens here but you need to add a repository to your sources list. To access to sources list you can use the following command.
1sudo nano /etc/apt/sources.listThen add follwing two lines there. Make sure you add the codename of your distribution. (bookworm in my case since I have Debian 12)
1deb http://deb.debian.org/debian/ bookworm main contrib non-free2deb-src http://deb.debian.org/debian/ bookworm main contrib non-freeSave and exit from the editor.
Then run following commands
1sudo add-apt-repository contrib2sudo apt-get update3sudo apt-get -y install cuda-toolkit-12-54sudo apt-get install -y cuda-driversNow you have successfully installed CUDA but it’s not finished yet. You have to add CUDA to the PATH. Execute following commands to do that.
1export PATH=/usr/local/cuda-12.5/bin:$PATH2export LD_LIBRARY_PATH=/usr/local/cuda-12.5/lib64:$LD_LIBRARY_PATH3source ~/.bashrcWell done! Now you can verify your CUDA installation by executing below command.
1nvcc --version
Installing Jupyter Notebook
Download the package using below command
1cd ~ && curl -O https://repo.anaconda.com/archive/Anaconda3-2021.11-Linux-x86_64.shRun following command to install it.
1bash Anaconda3-2021.11-Linux-x86_64.shNow you need to generate the config file so that you can save some configurations to make your life easier when running it. But first you need to reboot your VM instance.
1jupyter notebook --generate-configRun following command to edit the config file. Make sure to replace the <user_name>.
1nano /home/<user_name>/.jupyter/jupyter_notebook_config.pyAdd following lines and save the file.
1c.NotebookApp.token = ''2c.NotebookApp.ip = '*'3c.NotebookApp.open_browser = False4c.NotebookApp.port = 8888Finally, you are good to use jupyter notebook. Use following command to run.
1jupyter notebookIf you need your jupyter notebook to run even when the terminal is closed add following flags when running the above command
1jupyter notebook & disown
&: Puts it into the background of the currently running shell
disown: Removes the job from the background of the running shell and makes it run independently of the shell so that you may close it
Comments